How to apply a Sophos License Renew Key to your UTM
Overview
This article will show you how to:
- Apply a new Sophos license key to you existing UTM product after you have purchased a renewal,
- Align your subscription (If needed),
- Download the license file to your computer, and
- Apply the license file to your Sophos UTM hardware.
(Go get a cup of coffee first. We'll still be here waiting for you when you get back!)
Applying Upgrade Keys
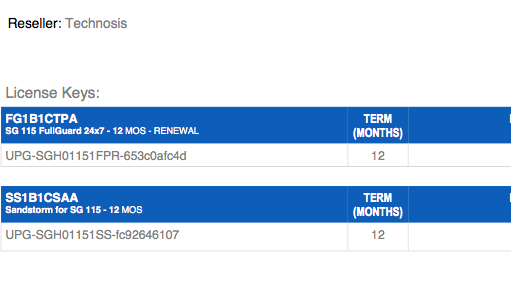
To start, you must first have received an email from TechNosis with a "license upgrade key".
It will have a section that shows the upgrade keys and will look something like this:
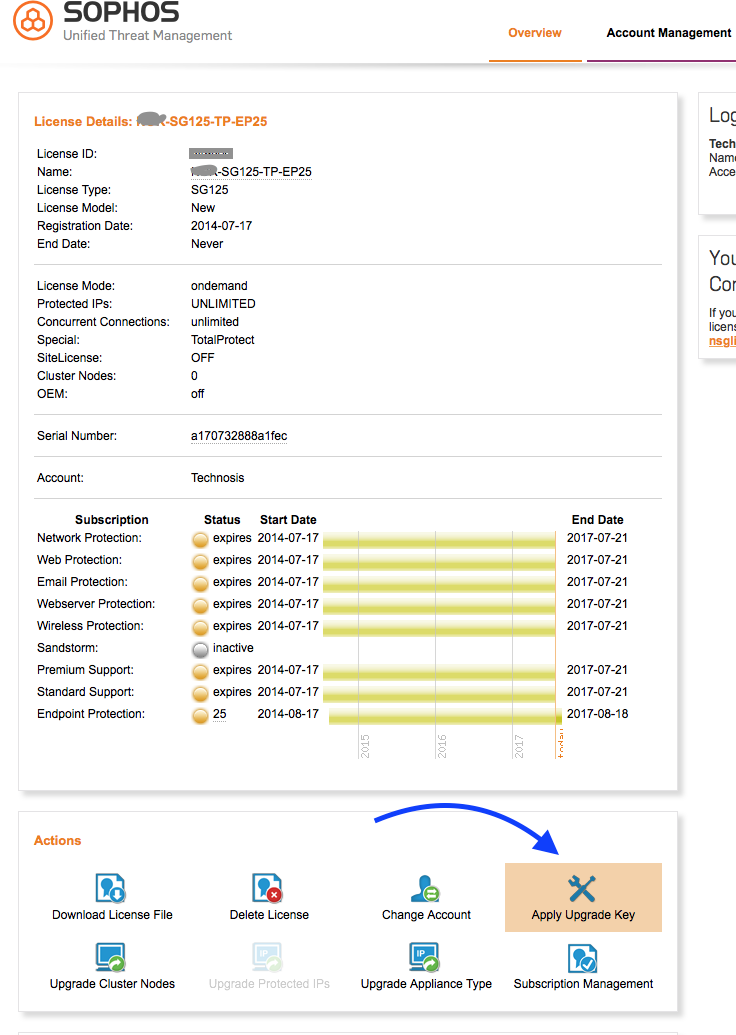
- Login into your http://myutm.sophos.com via your favorite browser and select the UTM UNIT you want to upgrade.
- If you have more than one Sophos UTM make sure you have selected the correct one.
- You see a screen that looks something like the one below.
- Then click the "Apply Upgrade Key" button near the bottom right as shown below.
- After you click the "Apply Upgrade Key" button, a smaller window will appear.
- Copy and Paste the "Upgrade Key" from yoru PDF license document into this area. (Only the brave or foolish would try to type it by hand )
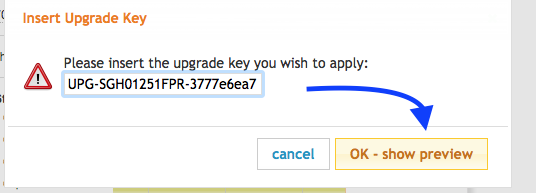
- Click the highlighted "OK - show preview" button. A preview will appear to verify which key your are installing. If it turns out to be the wrong upgrade key for whatever reason, you can still back out.
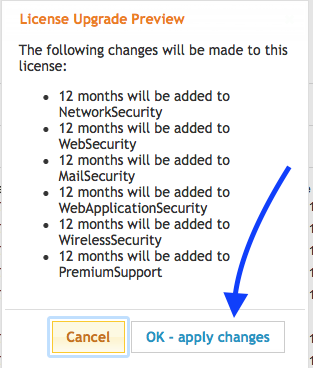
- Verify the items that will be upgraded and then click the "OK - apply changes" button as shown.
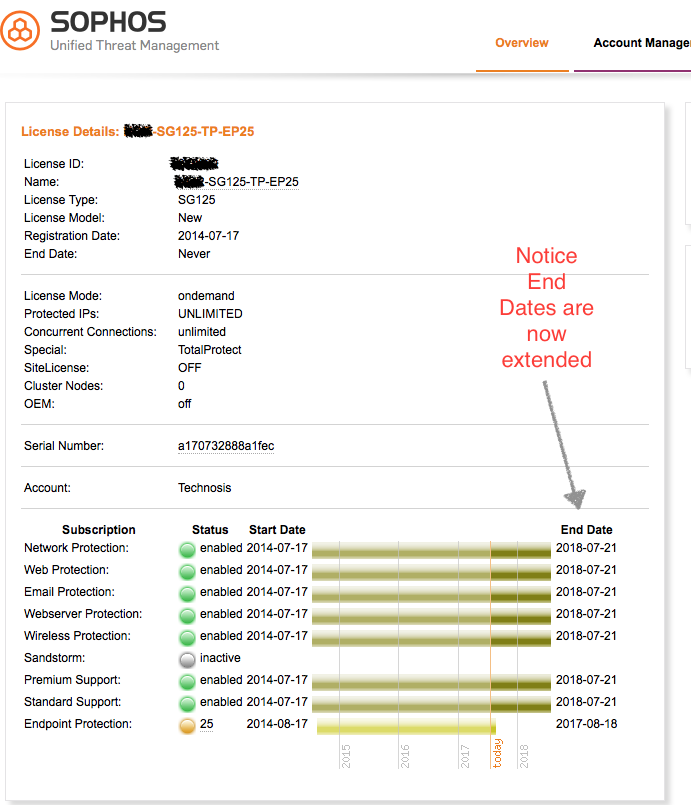
- After a very brief time, the License Upgrade Preview pane will go away and the License Details Window will be back in view.
- Verify ll the updated dates that are what you would have expected via the upgrade your just purchased.
- If you have more than one upgrade key, repeat the above procedure for each key, then continue with the steps below. If not, then continue.
Aligning your Sophos subscriptions
If your license details show unaligned subscription end dates. You can balance your license so that all features are co-terminus. It is also possible to activate new featuers that are currently not active. In this example we will activate Sandstorm. When balancing a license remaining dollar value is transferred from one feature to another based on the remaining license term.
If all your license are active and has the same end dates, then skip this section and do directly to the Downloading your license file section
Subscription alignment
The details section above shows a unit that has an expired "Endpoint Protection" subscription, and no "SandStorm" subscription. In this example we will activate the Sandstorm Attachment Analysis service. Sophos has made it very easy to "add" the Sandstorm subscription to your package so the next time you renew everything will be bundled together. To do this:
- Select the "Subscription Management" button in the lower right as shown below.
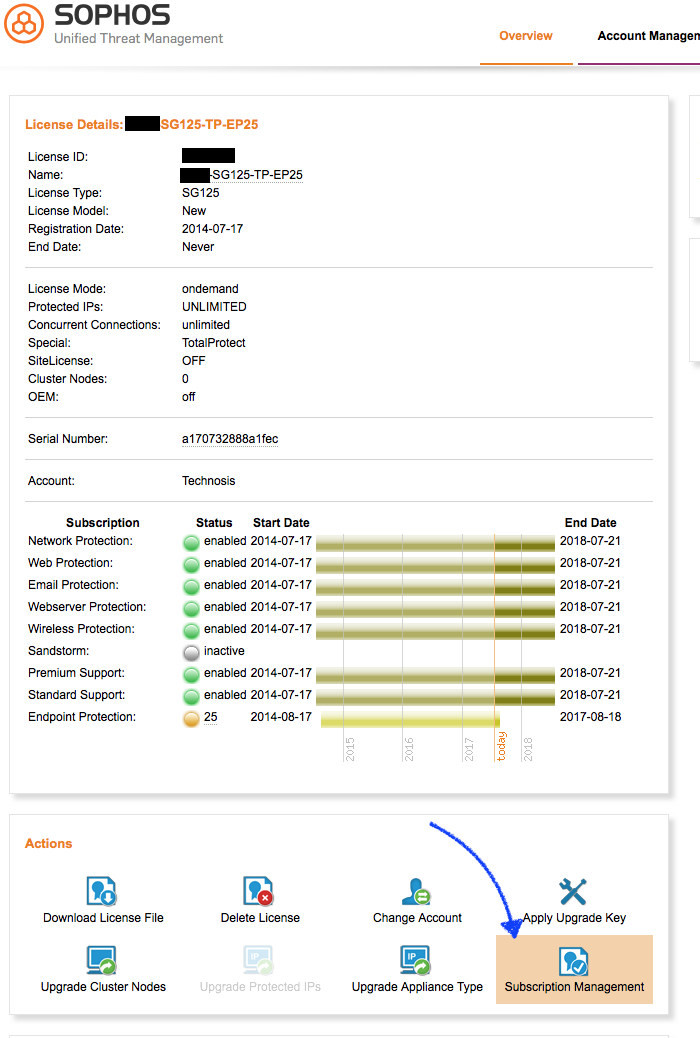
- This will bring up the Subscription Management window.
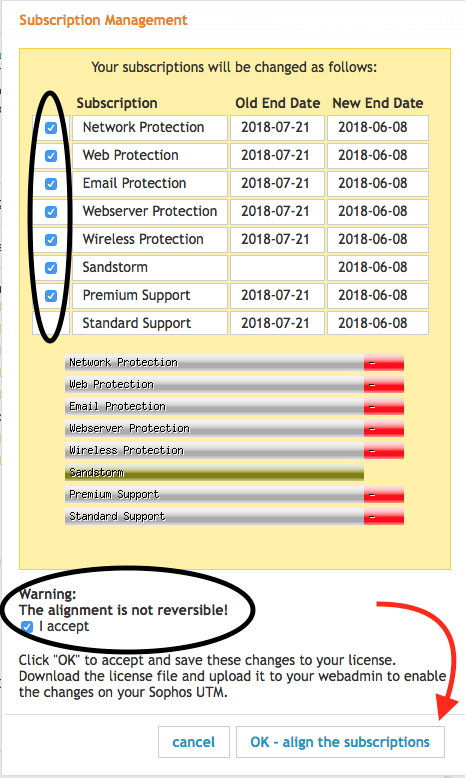
- As shown above: Check each box on the left hand side that for licenses that you would like make co-terminus. As you check boxes the adjusted expiration dates will appear in the "New End Date" column.
- In this example, because the system is allocating the "value" of the subscriptions you have already purchased to the un-purchased Sandstorm subscription results in the "New End Date" going back in time a few days to pay for the Sandstorm subscription. Everyone's adjustment will be unique. If you have a question about this section and are unsure how to proceed. Take a screenshot of where you are and contract "Technosis Customer Support Representative" for assistance.
- To continue check the "I accept" box farther down the screen.
- Click the "OK - align the subscriptions"
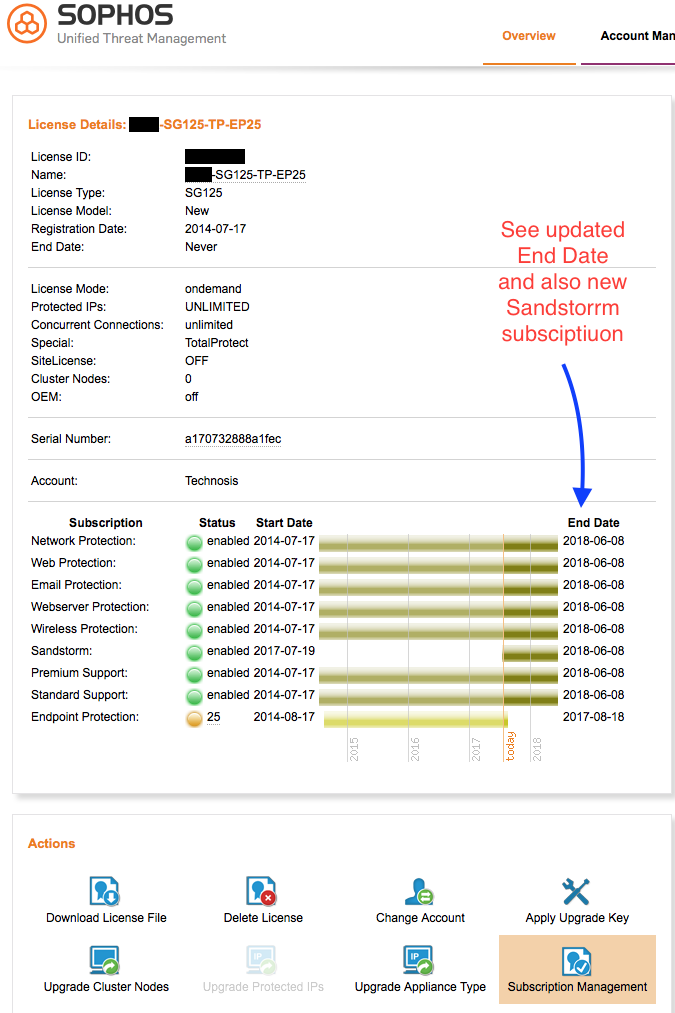
Your subscriptions are now aligned to each other as requested and the new end dates appear in the License Details page.
Downloading and Installing your License File
After applying your upgrade keys and verify your license is as expected, it is then time to download and install it on your UTM. Installing the new license file will replace the existing one running on your UTM. If you need to retain the old license for any reason make a UTM backup before installing. This is almost never necessary but you might be a special snowflake and have a good reason to do that.
Downloading the License File
- On the License Details window, click the "Download License File" button near the lower left as shown below.
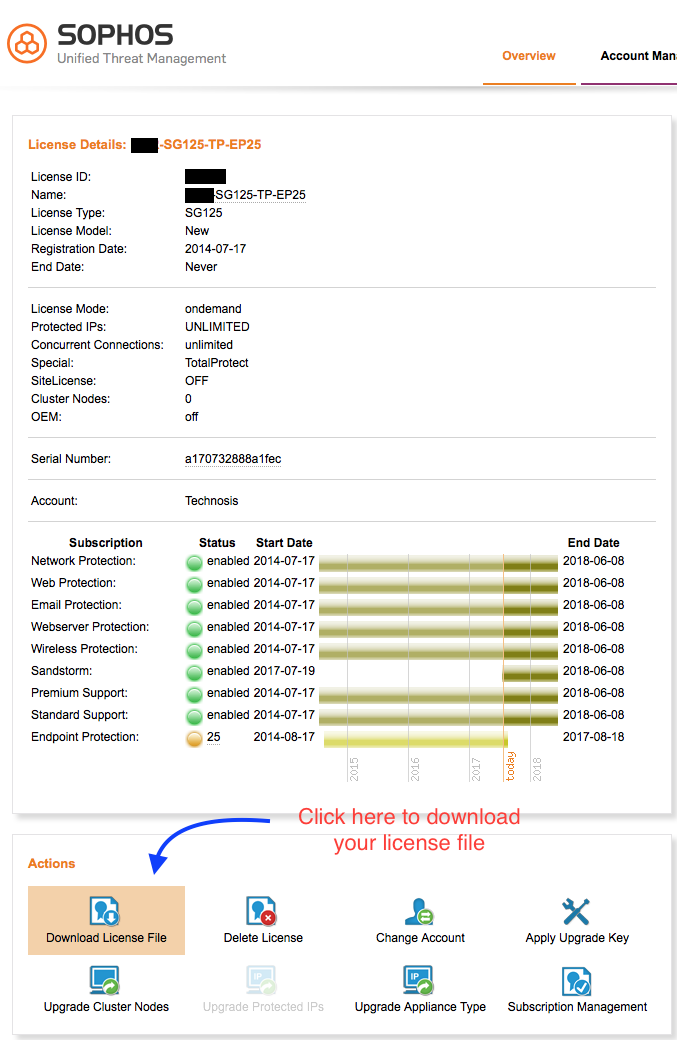
- Your license file will immediately download to your browsers default download folder. You will not get to choose what this file is named "License123456.txt (where the "123456" is your unique license number). Make a note of the name and the location and continue.
Applying your License File to your Sophos UTM
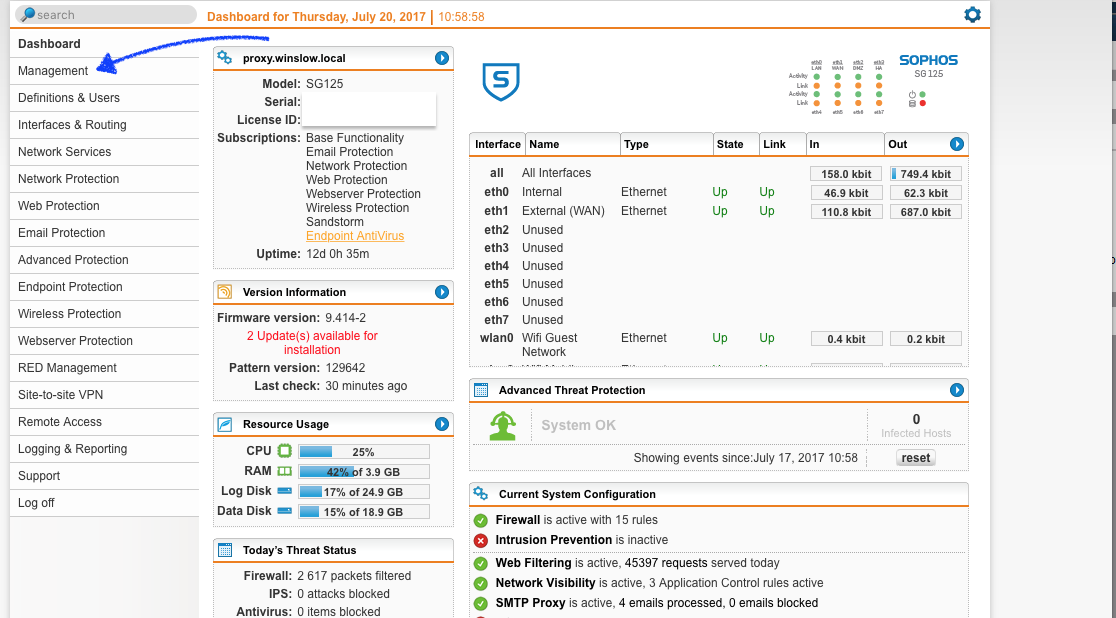
- Log into your UTM dashboard.
- Click the Management menu on the left as shown to bring up the management details screen.
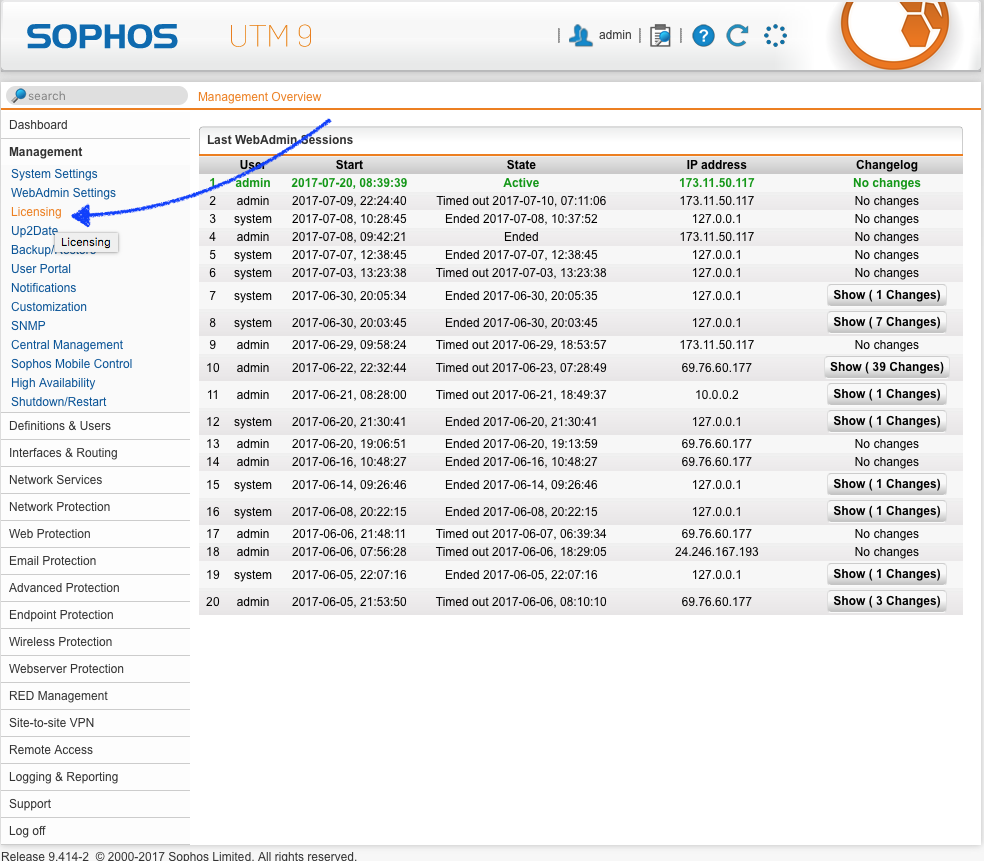
- Click the licensing sub-menu to bring up the license panel.
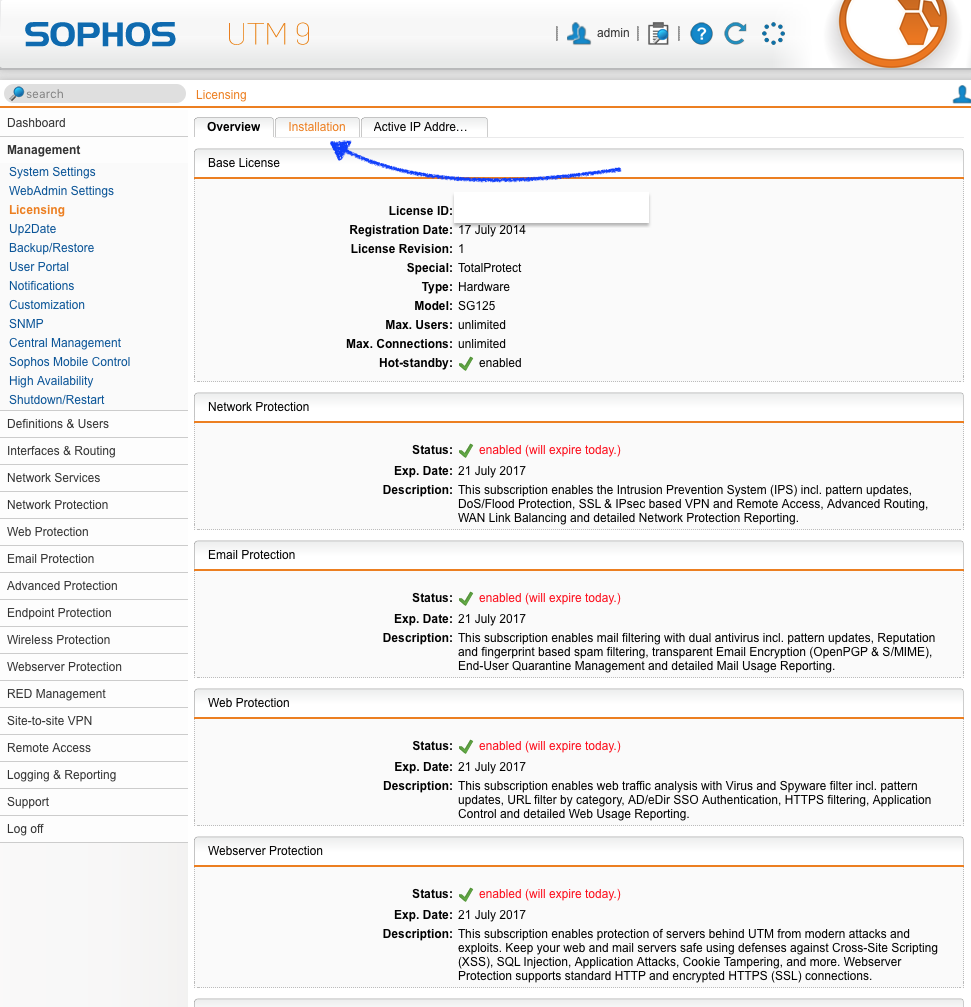
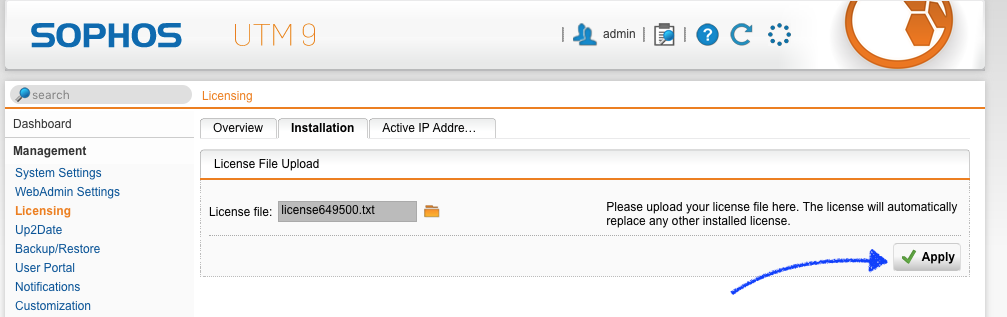
- Click the "Installation" tab on the Licensing pane to access the license install screen.
- Click the folder icon as shown by the arrow. To access the file upload dialog.

- Click the "Choose File" button. This will bring up your "file search/choose" window.
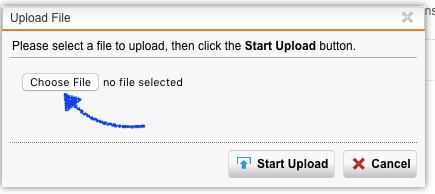
- Select your license files from the downloads folder. The filename will be similar to the one shown below "license111111.txt" (where the "111111" is a series of 6 numbers that uniquely identifies your license. Once you have the file highlighted remember to click OK or Choose depending on your browser and OS.

- Your window view will revert back to your Upload File window and the filename should be listed. Prior to installing the update the license file is scanned. You should seethe License Information summary info, including License Options segments as shown below.
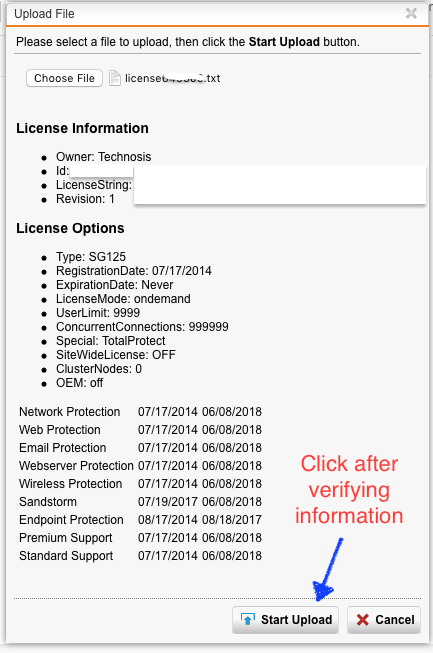
- Click the Start Upload button once you have verified the information is correct.This will upload the file to your Sophos UTM and place it in the secure transfer directory.
- To finalize the license install, click Apply to instruct your UTM to retrieve the license from the secure transfer folder, and install it.
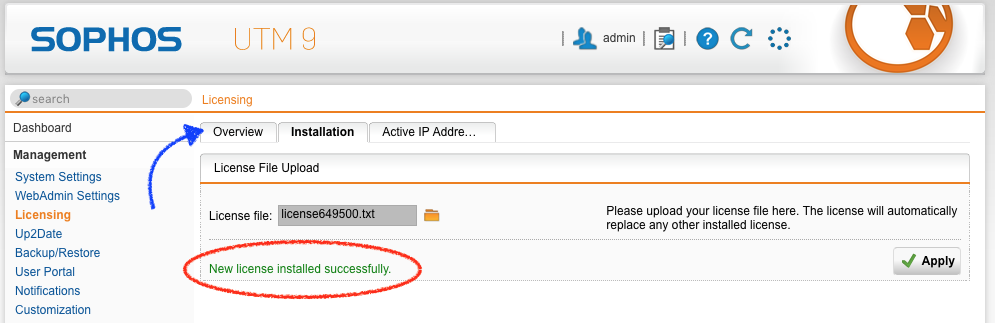
- Once the license is correctly applied, you will briefly see the New license installed successfully in the lower left corner. See circled text in step 12. This text self clears in a few seconds.
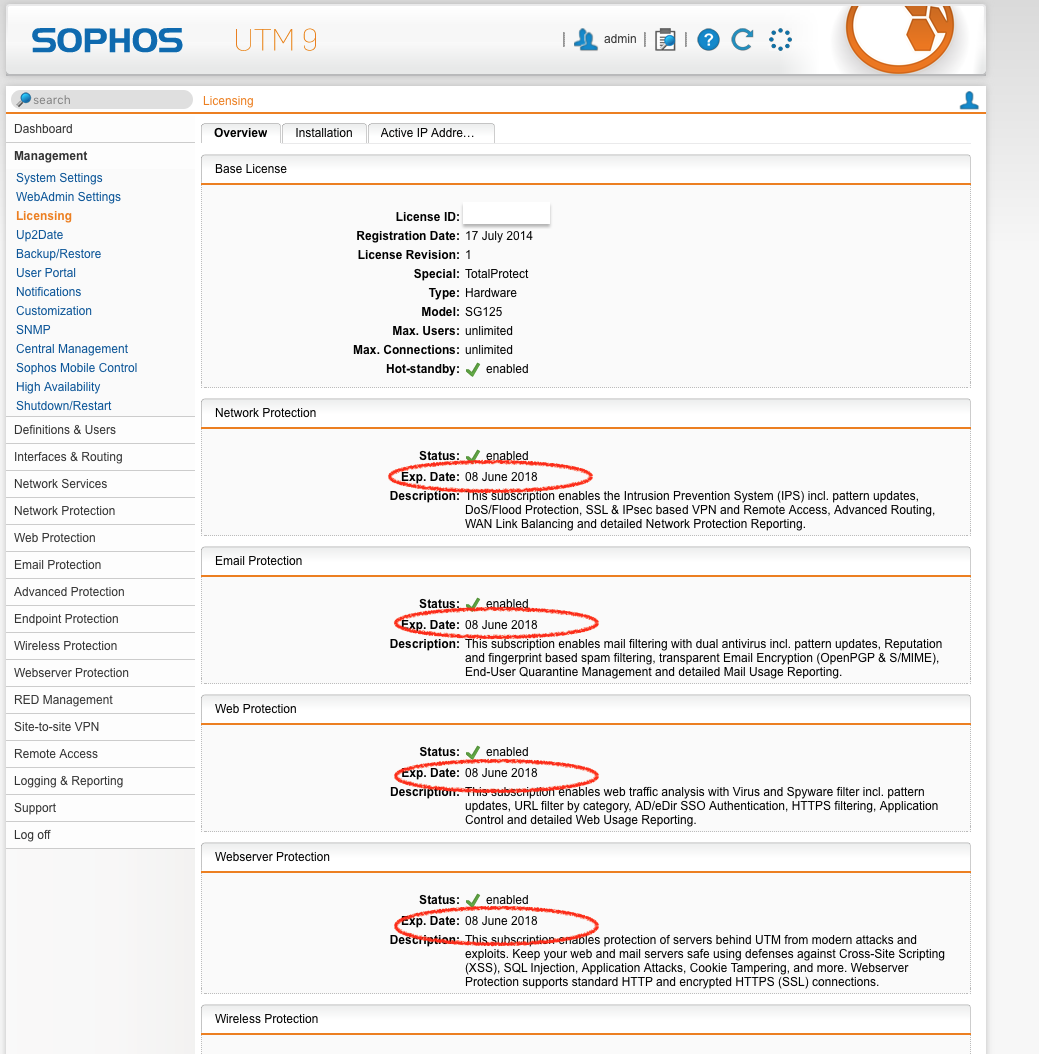
- Click the "Overview" at the top pointed to by the arrow.
- At the end of the process the Overview panel will now specify you new license expiration dates.
Congratulations - You are a pro at this now!