Installing Sophos XG Firewall VPN Client - MacOS SSL-VPN
Pre-Requisites
To use an SSL VPN with macOS, you will need a couple of pieces of info before proceeding:
- Mac Compatible SSL VPN software. We recommend the Viscosity VPN software based on openVPN.
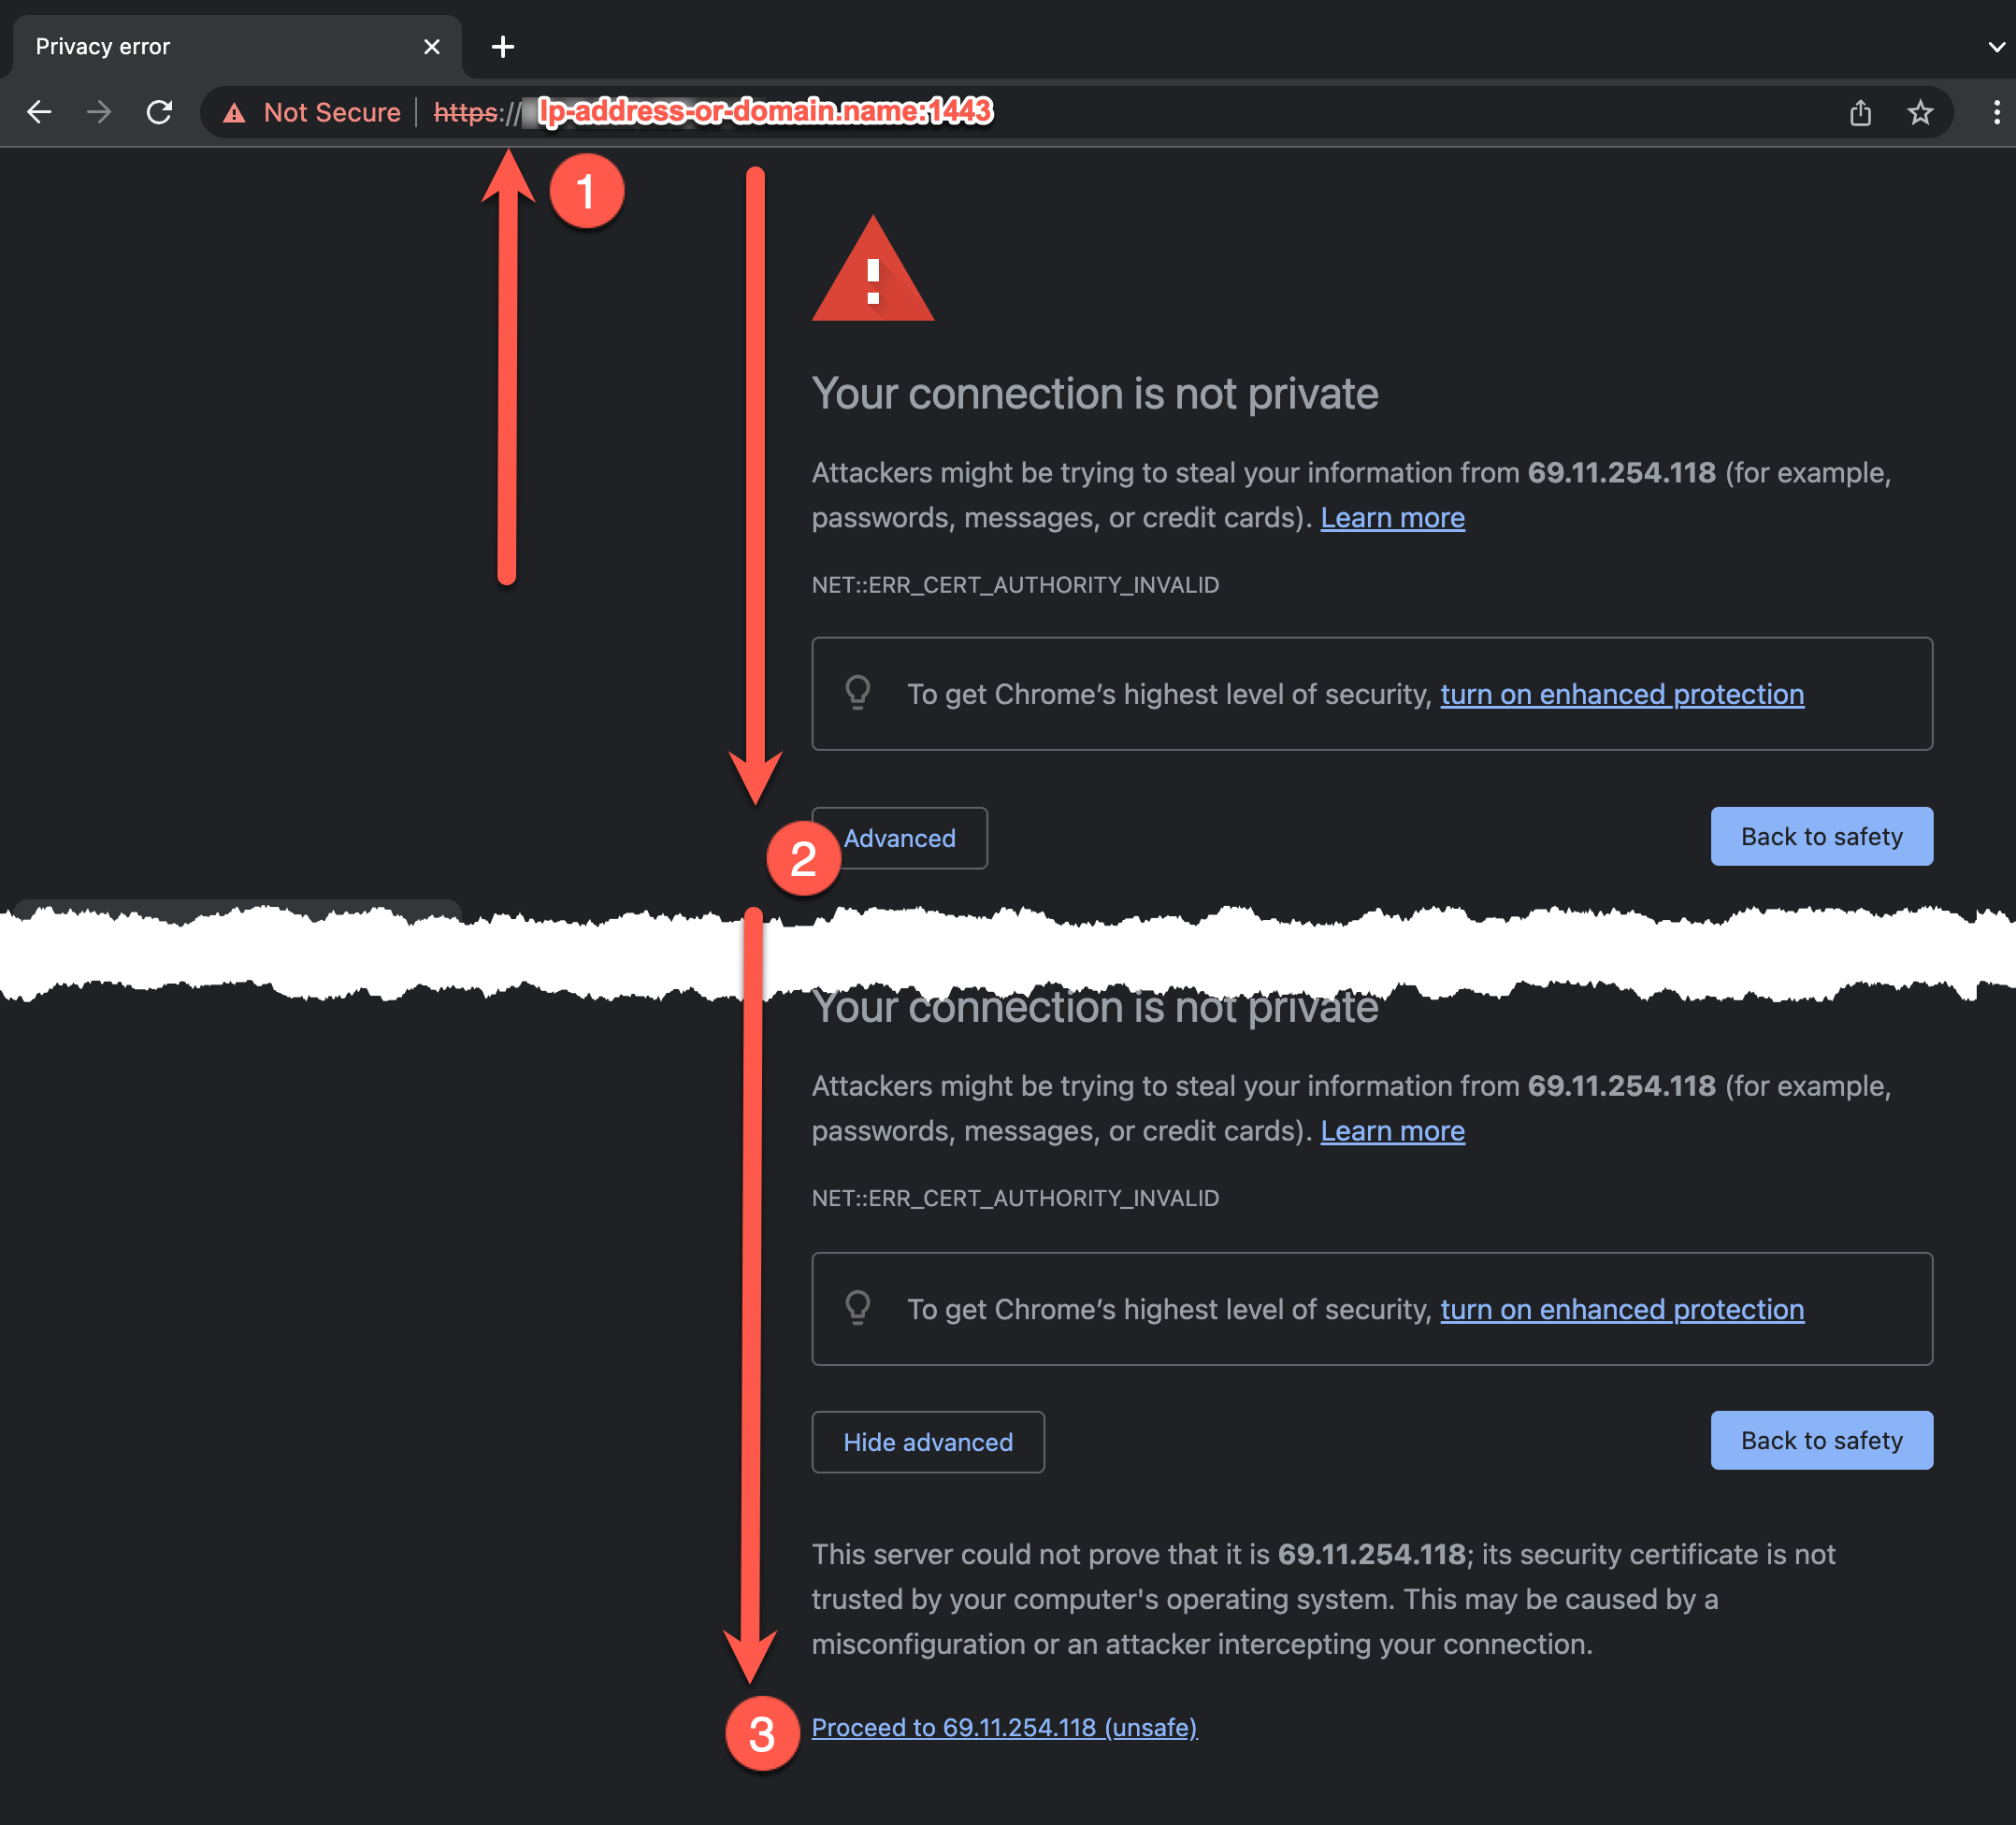
- The web address of your Sophos user portal; URL will look similar to:
https://proxy-st.companydomain.com
https://proxy-st.companydomain.com:1443
https://ipaddress:1443 - The ActiveDirectory Domain name that you are connecting to if you are using a Laptop in and out of the Office for full network access.
- Your ActiveDirectory username in short-form without the domain. This will be one of the following:
Firstname, First.Lastname, or FirstinitialLastnameThis will likely be the same name you login to your PC with, in the form of "Domainname\Username" or "Username@domainName.
Download and Install the Sophos VPN Configuration file
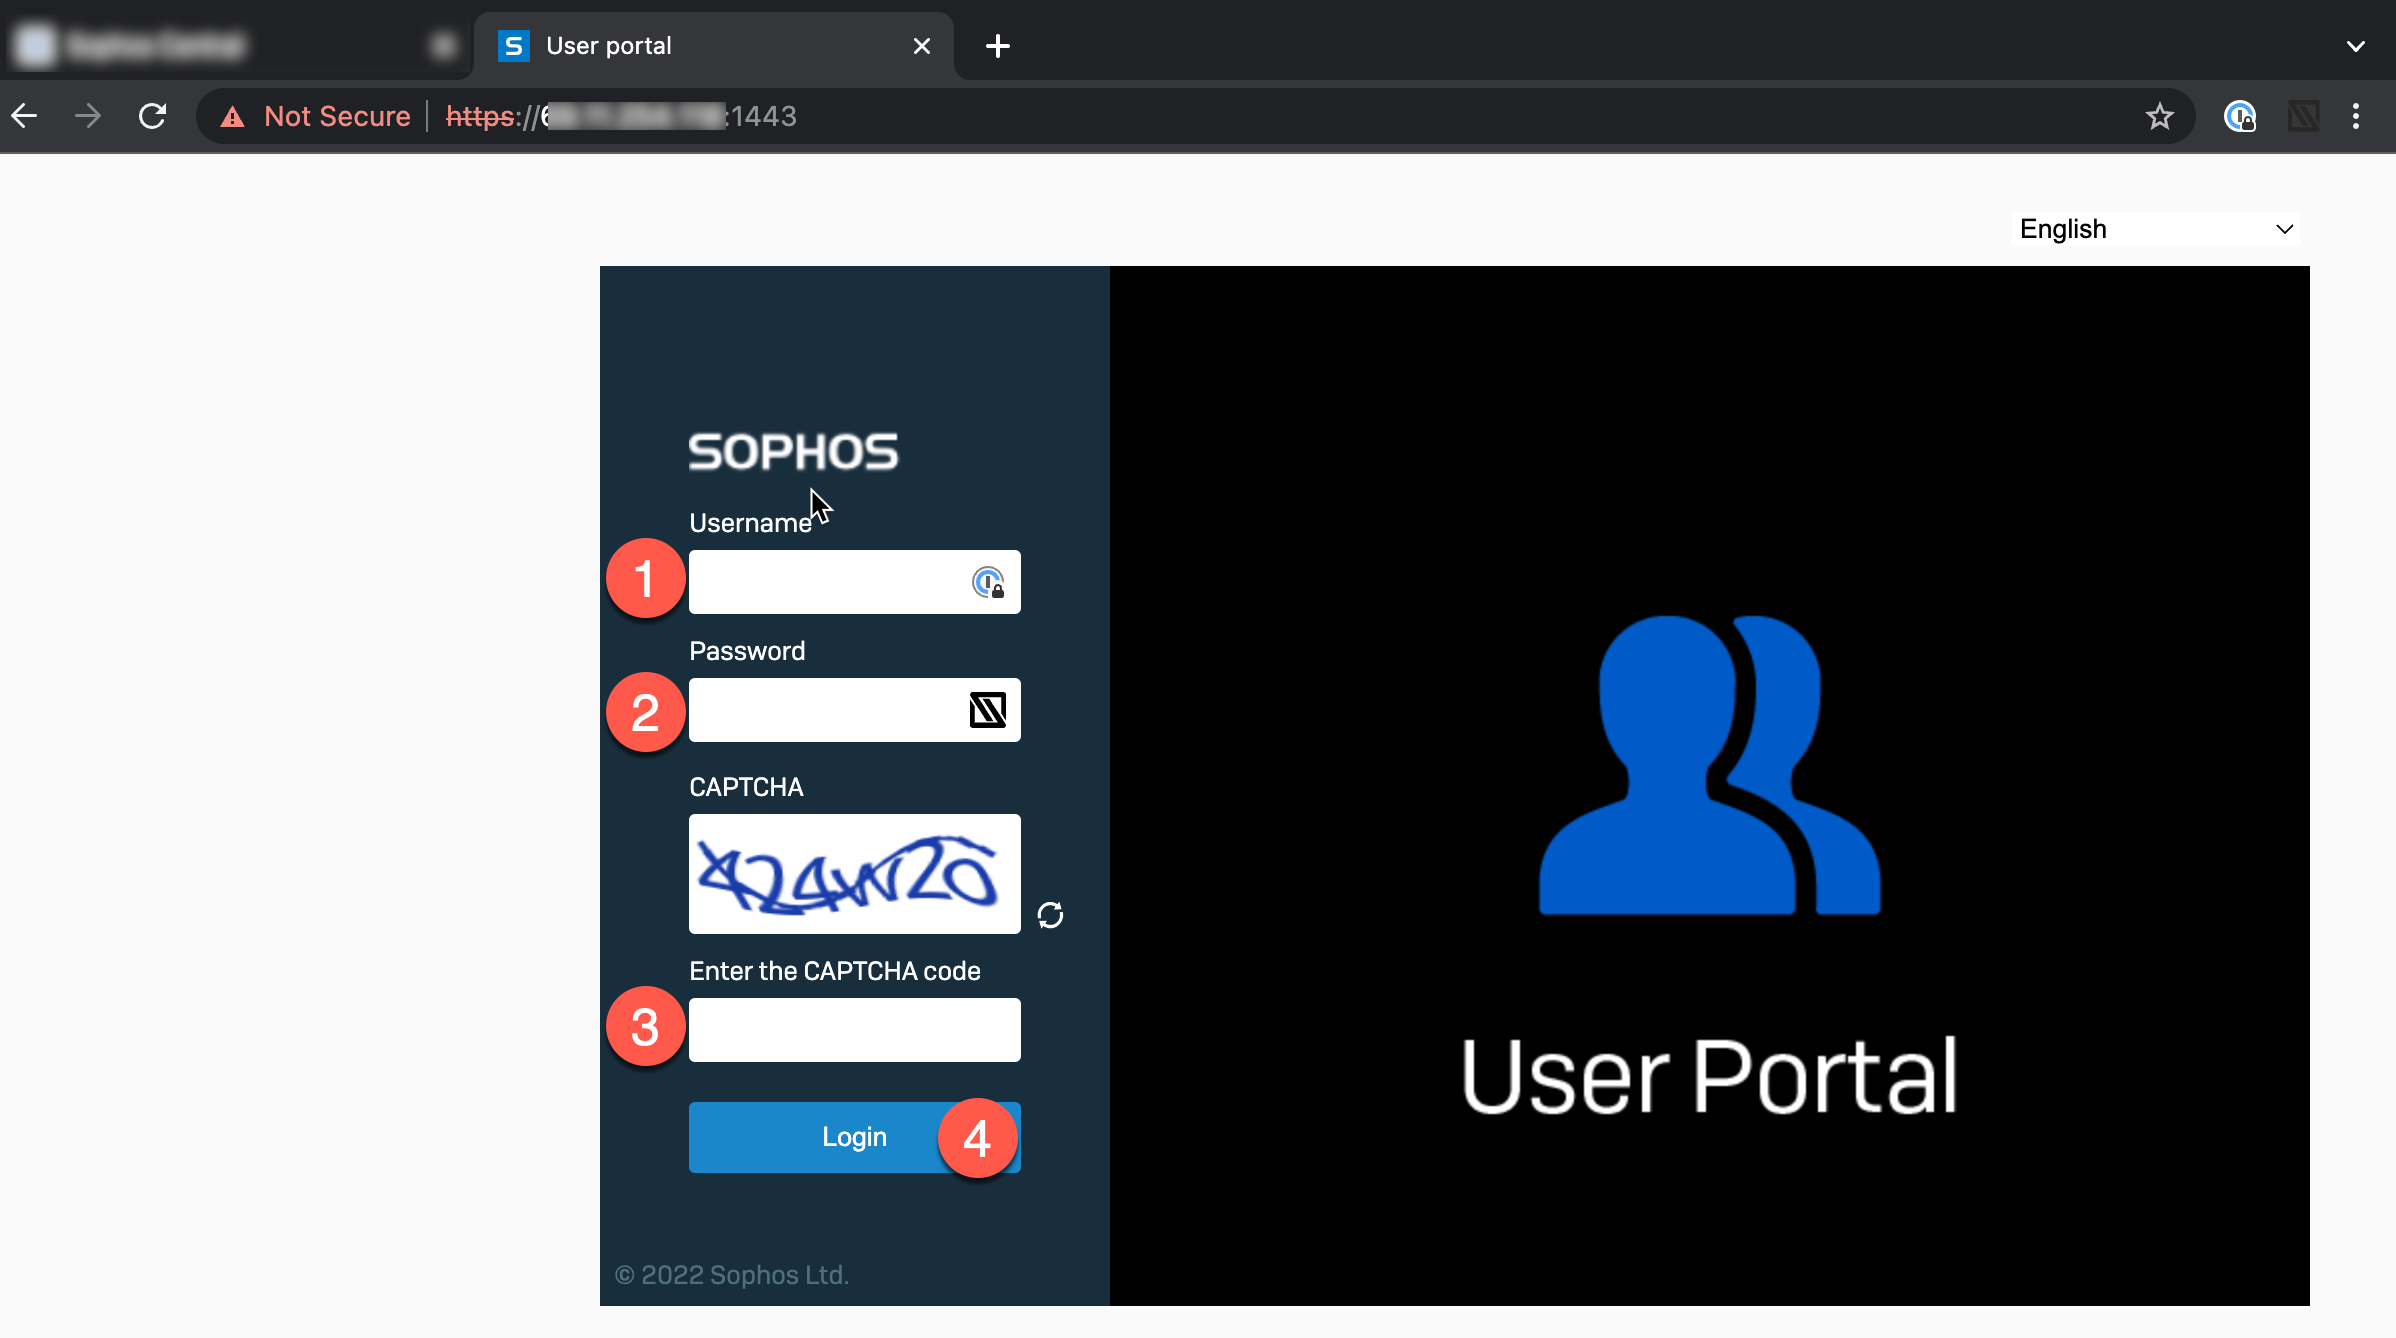
- Login to your VPN Portal (Your username and password will be the same as your office pc).
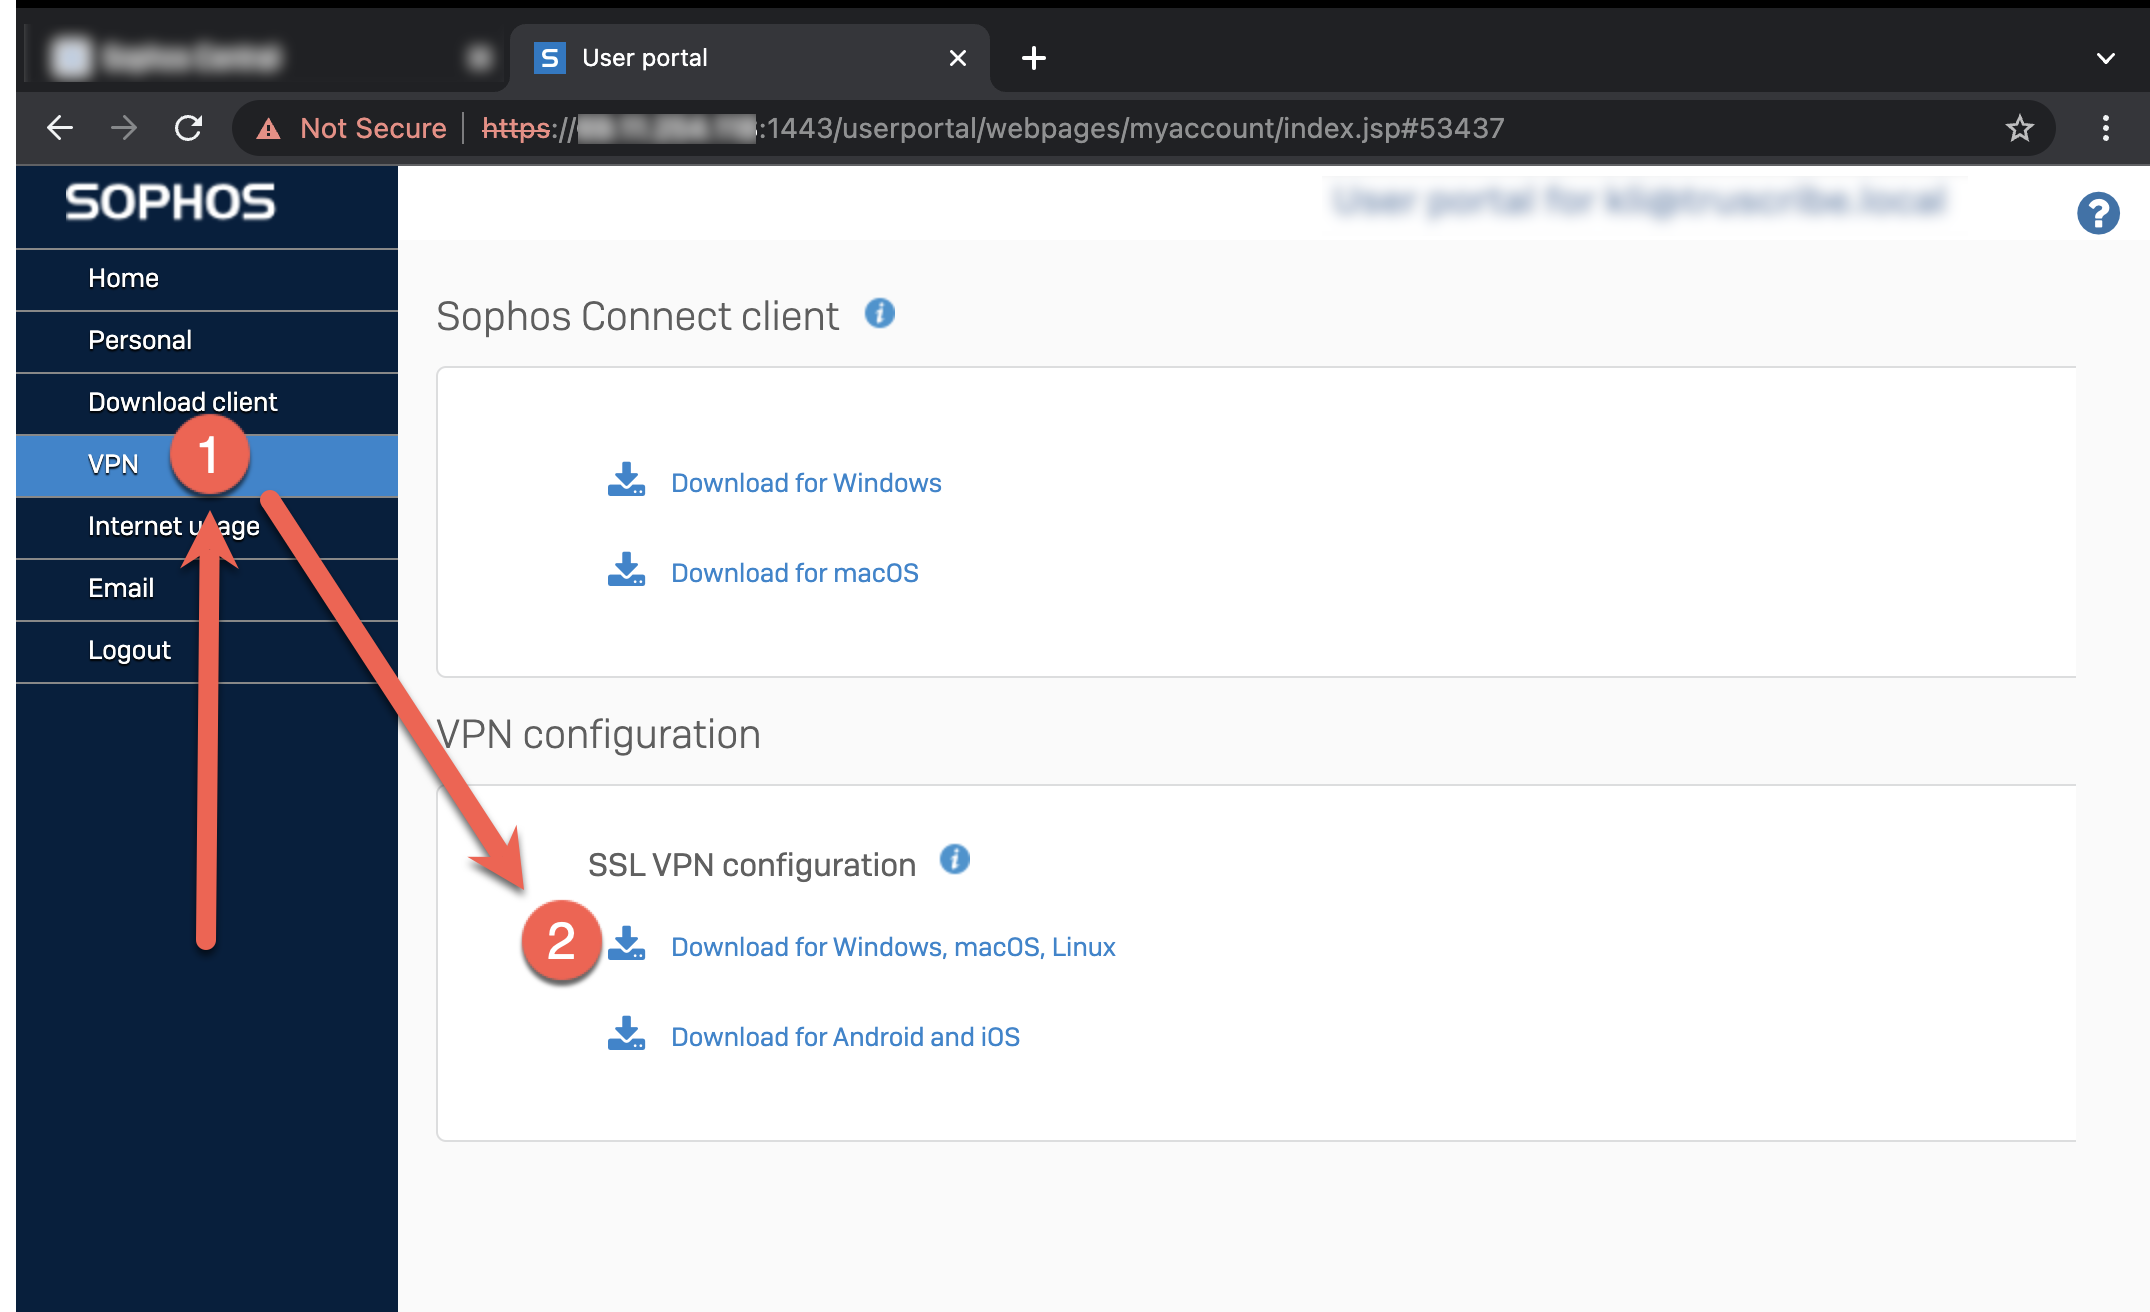
- Download the Sophos Connect configuration file Step 2 on the following screen. You will need this file at Step 6
- To install the Viscosity VPN Client, proceed to Spark Labs Web Site (Viscosity work equally well with MacOs and WinOS) https://sparklabs.com/viscosity/download/ click on the download button for your preferred OS

- macOS users open the DMG file via a double-click (winOS users run the .exe installer)
- Drag Viscosity to your Applications folder.
- Eject the Viscosity disk image.
- Launch Viscosity from your Applications folder.
- Enter your username and password so Viscosity can configure itself and install any necessary components.
- Drag Viscosity to your Applications folder.
Creating Your First Connection
You can create a connection in Viscosity by importing the OpenVPN configuration file.
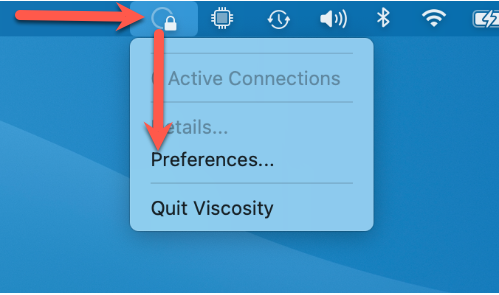
- Open Viscosity, go to the Viscosity menu and select “Preferences…”.The preferences window should appear.
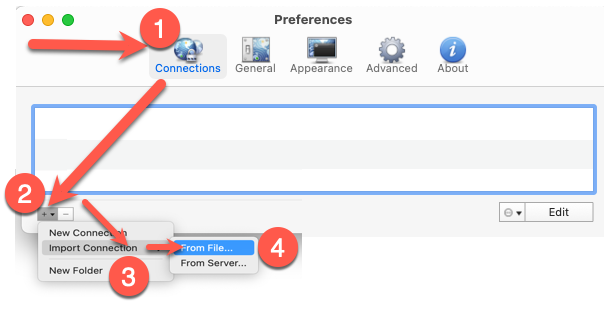
- Make sure the “Connections” toolbar item is selected, and then click the “+” button in the bottom left-hand corner of the window. Select “Import Connection” then "From File..." from the menu that appears.
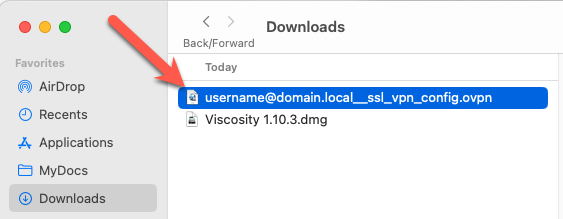
- Select the connection bundle (.visc) or OpenVPN configuration file (.ovpn or .conf) supplied by your server administrator. Click the Open button.
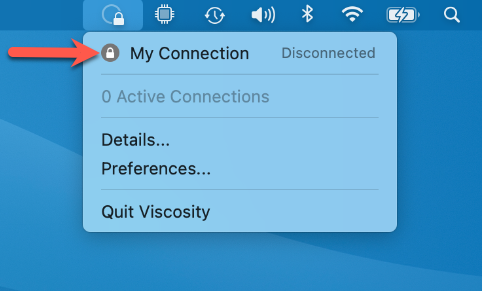
- Your connection will now appear in the Viscosity menu. To connect, select your connect from the menu. The menu icon will update to let you know when your new connection has been connected.
Advanced settings
For users with multiple connections or with the need to connect ad-hoc to many servers by short hostnames, making each connection domain-aware can improve the user experience. To enable domain name intelligence, perform the following steps for each connection:
- Proceed to Viscosity Preferences.

- Select the connection to modify and click Edit.

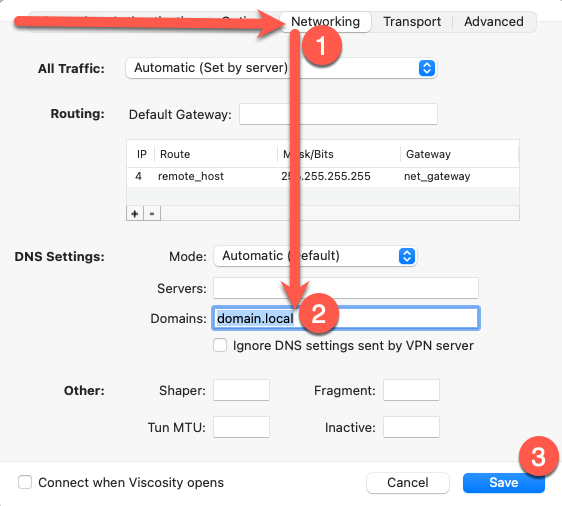
- Click on the Networking tab, Enter your domain name, in the domains box, and click save. For Sophos SSL VPN connections the domain name will be part of the .ovpn file name. If you are unsure of your domain name you may also ask your administrator for confirmation.
